Installation guide for TinyOS 2.x, TelosB, MicaZ and Imote2
sensor
This page is on how to install a recent TinyOS 2.x framework which
allow code development for TelosB, Crossbow MicaZ and Crossbow
Imote2 sensors. There are a lot of material out there and I've
learnt a lot myself with all the posts that are available. First of
all, there are many useful information on the TinyOS web site, then on the Crossbow
support Knowledge Base, and then from the invaluable feedbacks
of the many users that are too numerous to be listed here. However,
even with so much material out there, it was quite difficult for me
to get a simple snapshot of what should be done to get the easiest
to install development environment. One of the reasons is that many
contributions are a bit obsolete as software and hardware have
changed. Probably that this page will become obsolete in a while
also...
You can install from in a native Linux (Ubuntu for example) machine
or a non-Linux host environment (Windows, Mac OS X mostly). The last
solution is mainly based on installing an Ubuntu VMWare image with
VMWare software running in the host environment. For those with a
native Linux environment, this may also be one solution as
your version of Linux may not be suitable. The TinyOS
installation procedure can be seen here.
Prior to this step, you probably need to install the tool-chain
first and you can proceed as decribed here which is probably
the easiest way.
Here is a summary of the required steps depending on your starting
configuration.
- Non-Linux system: start at step (1)
- Linux system but you want to use a VMWare image for some
reason: start at step (1)
- Linux system and you want to install manually: perform the
installation procedures and then go to step (3)
First of all, I'm using a MacBook Pro with Mountain Lion (10.8.2)
with VMWare Fusion 5. Should work with any other configuration as it
mostly depends on the VMWare software.
1. get and install VMWare (VMPlayer is free for Windows and
Linux) for your environment (Linux, Windows, MacOS X,...).
The image includes:
* Ubuntu 9.04
* TinyOS-2.x + TinyOS-2.x-contrib CVS
repositories (checked out October 2009)
* Ready TinyOS environment
* Eclipse 3.5.1 + Yeti 2 plugin installed (TinyOS
2 Plugin for Eclipse)
Decompress it and open it with VMWare (there are 2 users: nap and
root as explained on the web page). The VMWare image has TinyOS-2.x
+ TinyOS-2.x-contrib CVS repositories and fully support the micaz
platform.
3. compiling the Blink application for the micaz sensor platform
Asuming that you've installed you TinyOS 2.1.2 tree in /opt
$ cd
/opt/tinyos-2.1.2/apps/Blink
$ make
micaz
$ make
telosb
It should work fine and produce the main.exe
file in the build directory
4. intelmote2 support
However, the VMWare image does not support the intelmote2 platform
and additional tools and compiler have to be installed. Therefore if
you try compiling for the intelmote2 platform with make intelmote2,
you will have a problem indicating that the xscale-elf-gcc
compiler can not be found. To fix this problem download the
following packages:
http://sing.stanford.edu/intelmote2/tools/linux/xscale-elf-binutils-2.15-2.i386.deb
http://sing.stanford.edu/intelmote2/tools/linux/xscale-elf-gcc-3.4.3-2.i386.deb
http://sing.stanford.edu/intelmote2/tools/linux/xscale-elf-newlib-1.13.0-1.i386.deb
When you try to install the packages by clicking on the first link,
you may have a conflict with /usr/lib/libiberty.a. I had this
problem on Ubuntu 9.04 but not anymore on Ubuntu 10.04. If you have
conflict issue, you have to execute (as root is a new terminal) the
following commands before:
# cd
/usr/lib
# mv
libiberty.a libiberty-avr-gcc.a
and then install manually the package (supposed you are in the
directory where you downloaded the .deb files) with dpkg.
Note the --force-overwrite
option for the first package to manage the libiberty.a problem (that
was already installed from the avr-gcc package for micaz platform
included in the VMWare image)
$ dpkg
--force-overwrite --install xscale-elf-binutils-2.15-2.i386.deb
$ dpkg
--install xscale-elf-gcc-3.4.3-2.i386.deb
$ dpkg
--install xscale-elf-newlib-1.13.0-1.i386.deb
get back to the terminal where you are logged as root. We keep the
newest one (the libiberty-avr-gcc.a since it has a bigger size) and
make a link on it
# mv
libiberty.a libiberty-xcale-elf-gcc.a
# ln -s
libiberty-avr-gcc.a libiberty-newest.a
# ln -s
libiberty-newest.a libiberty.a
# exit
This is actually the solution I came to. It is possible that only
the newest one should be kept and the symbolic links are not useful.
5. compiling the Blink application for the intelmote2 sensor
platform
$ cd
/opt/tinyos-2.1.0/apps/Blink
$ make
intelmote2
Everything should be OK now.
6. installing the compiled code on the TelosB, MICAz hardware
We have so far only compiled the code. We have to install it on the
sensor board memory. For the MicaZ, you need to have the MIB510 or
MIB520 board. The description here is for the MIB520 board with a
built-in USB port. The simplest way to do it is:
$ make
micaz install mib520,/dev/ttyUSB0
For the TelosB:
$ make
telosb install bsl,/dev/ttyUSB0
Actually,
the general syntax is:
make
<platform> re|install.<n>
<programmer>,<port>
as explained in the "Getting
Started
Guide" from Crossbow. The optional <n> parameter
indicated the node ID (in decimal) that you want to put in the
sensor.
You may need to install the FTDI drivers (link here
to the 1.1.12) from FTDI and the uisp programmer (see here).
For FTDI, here is a script for version 1.1.12:
wget
http://www.ftdichip.com/Drivers/D2XX/Linux/libftd2xx1.1.12.tar.gz
gunzip libftd2xx1.1.12.tar.gz
mkdir libftd2xx1.1.12
cd libftd2xx1.1.12
tar -xvf ../libftd2xx1.1.12.tar
cd release
cp ftd2xx.h /usr/include
cp WinTypes.h /usr/include
chmod a+r /usr/include/ftd2xx.h /usr/include/WinTypes.h
cd build/i386
cp libftd2xx.so.1.1.12 /usr/local/lib
cd /usr/local/include
rm -f ftd2xx.h
rm -f WinTypes.h
ln -s /usr/include/ftd2xx.h ftd2xx.h
ln -s /usr/include/WinTypes.h WinTypes.h
cd /usr/local/lib
rm -f libftd2xx.so
ln -s libftd2xx.so.1.1.12 libftd2xx.so
cd /usr/lib
rm -f libftd2xx.so
ln -s /usr/local/lib/libftd2xx.so.1.1.12 libftd2xx.so
ldconfig
You can then use TinyOS
printf library for a very convenient way to display data on
your PC. Starting from version 2.1.2 the semantic of printf
has changed, as explained in tos/lib/printf.
$ java
net.tinyos.tools.PrintfClient -comm serial@/dev/ttyUSB0:telosb
On the
MicaZ, there is one serial port for programming and one serial
port for output so if you use USB0 for programming the mote, you
will use USB1 for getting the output:
$ make micaz
install mib520,/dev/ttyUSB0
$ java
net.tinyos.tools.PrintfClient -comm serial@/dev/ttyUSB1:micaz
7. installing the compiled code on the Imote2 hardware
As far as I understood, here is the situation for the Imote2.
For the Imote2, there is a difference when you are using a
Window-based programming environment or a Linux-based as it is
described here. For Windows, there is no need of a JTAG dongle as
said so in many web sites nor of the IIB2400 board as a USB boot
loader can be used (see here
for a description here for checking whether the USB boot loader is
installed or not). Actually, the JTAG dongle and the IIB2400 board
are needed only if you want to change the Imote2 bootloader.
If you want to use Windows+cygwin+TinyOS, follow this
link.
For a Linux-based environment, things are not as easy. You actually
need a JTAG cable as direct USB programming is not supported (I
don't know why exactly nor do I know how difficult it is to get the
same USB features on a Linux-based environment).
So, for Linux-based programming environment, the most common way of
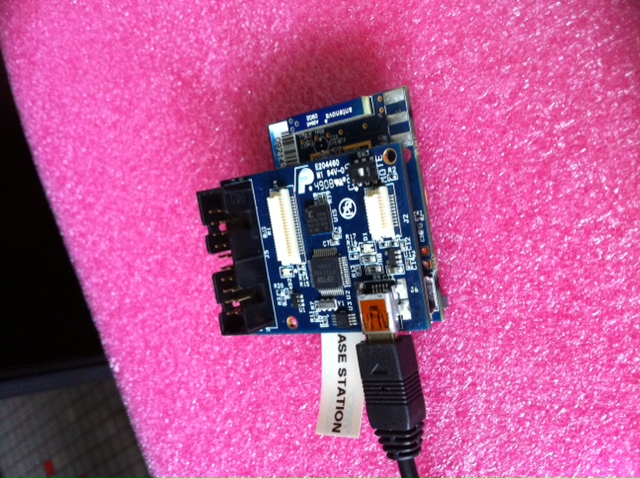
programming the Imote2 is through a JTAG cable (I use Olimex)
connected to the IIB2400 board, which is then connected to the USB
port of the host computer. Then another USB cable will connect your
iMote2 USB interface (not the one of the IIB2400) to the computer as
well. See figure below.

Then use openocd
software as described in this
page. You will find on this page links to the supported JTAG
cable from Amontec and Olimex, along with links for the FTDI
libftd2xx library to support the JTAG connexion and the required
configuration files. Personnaly, I use openocd
v0.4.0 that I've installed with:
tar xvfz
openocd-0.4.0.tar.gz
cd openocd-0.4.0
./configure --enable-maintainer-mode --disable-werror
--enable-ft2232_ftd2xx
make
sudo make install
sudo chmod 4755 /usr/local/bin/openocd
Once everything's setup, you can upload your program with the
following command line (don't forget to press on the reset button on
the Imote2 before):
$ make
intelmote2 install openocd
Then, you can also use the TinyOS printf library for easy display
(it has been reported that the printf library is not working on the
Imote2 but I had no problem under Tinyos 2.1.2). When you want to get the output from the
iMote2, you have to use the IIB2400 board and connect the USB
interface of the board (not the one of the Imote2) to the PC. See
below.
Normally you should have
2 USB-serial interface /dev/ttyUSB0 and /dev/tty/USB1. On
the iMote2, we have the same situation that for the MicaZ: there is one serial port for
programming (even though Linux uses a JTAG and not the USB) and
one serial port for output so you need to use USB1 for getting the
output.
$ java
net.tinyos.tools.PrintfClient -comm
serial@/dev/ttyUSB1:intelmote2
7. Use another Bootloader and programming environment for Imote2
Here is a link decribing a completely different bootloader and
tool-chain for the Imote2. Seems quite promising but I've haven't
tried it yet.
"Based
upon the TinyOS-Bootloader for the Imote2, a new, completely
rewritten Bootloader"
8. Using the camera on the Imote2
See this page