last update: October 20th, 2014.
This page describes the relay nodes used in our multimedia wireless sensor network test-bed.
We build relay nodes for Libelium WaspMote, Arduino, MicaZ,
iMote2, TelosB and Zolertia Z1 (the Z1
was kindly provided by Zolertia). The first 2 platforms use the
Arduino IDE and programming libraries while the last 4 platforms
use the TinyOS operating system and development environment. All
of these programs started as advanced receiver nodes for various
projects where performances of communication stacks on wireless
networks were investigated. Then the relaying functionality was
added later on for the purpose of measuring the relaying
performance (receive packet then transmit packet). A paper in IFIP
WirelessDays'2013 summarizes our results for all the mentioned
mote platform in order to provide to the scientific community
important performance measures when considering multi-hop wireless
sensor networks:
We tried to have the same core functionalities regardless of the
platform and chose to have a manually configurable interface
rather than a particular routing protocol. All relay node accepts
at least the two following main commands: /@R# and /@D#. /@R# is
used to dynamically toggle the MAC layer ack mechanism or not:
/@R0# disables MAC layer ack and /@R1# enable MAC layer ack. The
/@D# command specifies either 64-bit or 16-bit destination
address. The usage of these relay nodes is described in our page "Multimedia transmission on Wireless Sensor
Networks: image and audio". For instance you will find
utility tools and shell scripts that can automatize the
configuration of several relay nodes to initiate multi-hop
forwarding from source to final destination.
The programs are provided as they are. You can have a close look
at the source code to better understand their functionalities.
Sniffer/Relay source code: Libelium WaspMote (.pde,
.zip),
Arduino (.ino,
.zip). The
Arduino version needs the XBee communication library that can be
found here.
By default, relay_mode
is set to true so the node is receiving and relaying incoming
packets. And compilation time, FINAL_DEST_MAC_ADDR stores the 64-bit
destination address for relaying. You can either change this
constant or, best solution, send a /@D0013A200408BC823# command to the
relay node in order to set the destination address to
0x0013A200408BC823 for instance. Be sure that all your XBee module
are in the same PANID and use the same radio channel.
Important notice: The Arduino version uses a external LCD display
to display useful information, to disable the LCD, just uncomment
the WITH_LCD
definition.
Sniffer/Relay source code: (.zip)
MicaZ, TelosB and Z1 are programmed with TinyOS. We use version
2.1.2. The IEEE 802.15.4 TKN154 protocol stack is used instead of
the Active Message protocol stack. In this way, there is full
interoperability with XBee modules used by other platforms such as
Libelium WaspMote and Arduino. You can check this page
to have more information on communication interoperability between
various sensor platforms. The nodes are programmed to work in
PANID 0x3332 and radio channel 0x0C.
To build a relay node for a TelosB, type:
>
CFLAGS="-DNODE_SHORT_ADDRESS=0x0050" make telosb
> make telosb reinstall bsl,/dev/ttyUSB0
if your mote is on /dev/ttyUSB0.
For a MicaZ, you have to type:
>
CFLAGS="-DNODE_SHORT_ADDRESS=0x0050" make micaz
> make micaz reinstall mib520,/dev/ttyUSB0
Sniffer/Relay source code: (.zip)
The relay node on the iMote2 uses the Ieee154 stack in TinyOS. It
is mainly intended for iMote2 platform as TKN154 is not supported
on iMote2. As TinyOS Ieee154 only support 16-bit addresses, the
limitation is that you cannot set a 64-bit destination address.
For TelosB and MicaZ, it is better to use the TKN154 version which
does not have this limitation. The nodes are programmed to work in
PANID 0x3332 and radio channel 0x0C.
To build a relay node for an iMote2, type:
> make intelmote2
> make intelmote2 reinstall.0x0050 openocd
to produce a code that will set the node's short address to
0x0050. There is a README.txt
file in the .zip package that provides additional information on
the various compilation options.
The TKN154 protocol stack provide an efficient promiscuous node
which is shown in the TestPromiscuous or packetsniffer example. We improved TestPromiscuous to
build a sniffer/relay node that are used previously as relay nodes
on TelosB and MicaZ. Output on screen uses the TinyOS Printf component.
You can use the same program than previously but in order to
build a promiscuous sniffer you have to type:
>
CFLAGS=-DSNIFFER_CONF make telosb
in which case, you may want to have a larger buffer for printf
>
CFLAGS="-DPRINTF_BUFFER_SIZE=1500 -DSNIFFER_CONF" make telosb
> make telosb
reinstall bsl,/dev/ttyUSB0
Of course, this also work for MicaZ but the communication speed
between the MicaZ and the computer is limited to 57600 bauds which
is a bit slow for printing large amount of information. Therefore
it is better to use a TelosB where the communication speed is
increased to 115200 bauds. You can then type:
> java
net.tinyos.tools.PrintfClient -comm serial@/dev/ttyUSB0:telosb
and you should be able to capture packets in a promiscuous way.
However, be sure to be on the same radio channel. The motes are
programmed to be on radio channel 0x0C.
Frametype:
Data
SrcAddrMode: 2
SrcAddr: 0x6287
SrcPANId: 0x3332
DstAddrMode: 2
DstAddr: 0xFFFF
DestPANId: 0x3332
DSN: 170
MHRLen: 9
MHR: 0x61 0x88 0xAA 0x32 0x33 0xFF 0xFF 0x87 0x62
PayloadLen: 38
Payload: 0x54 0x65 0x73 0x74 0x49 0x6E 0x64 0x69 0x72 0x65
0x63 0x74 0x2C 0x20 0x43 0x6F 0x6F 0x72 0x64 0x69 0x6E 0x61
0x74 0x6F 0x72 0x20 0x74 0x61 0x6C 0x6B 0x69 0x6E 0x67 0x20
0x6E 0x6F 0x77 0x21
MpduLinkQuality: 108
Timestamp: 58237590
Frametype: Acknowledgement
SrcAddrMode: 0
SrcAddr:
DstAddrMode: 0
DstAddr:
DSN: 170
MHRLen: 3
MHR: 0x02 0x00 0xAA
PayloadLen: 0
Payload:
MpduLinkQuality: 107
Timestamp: 58237720
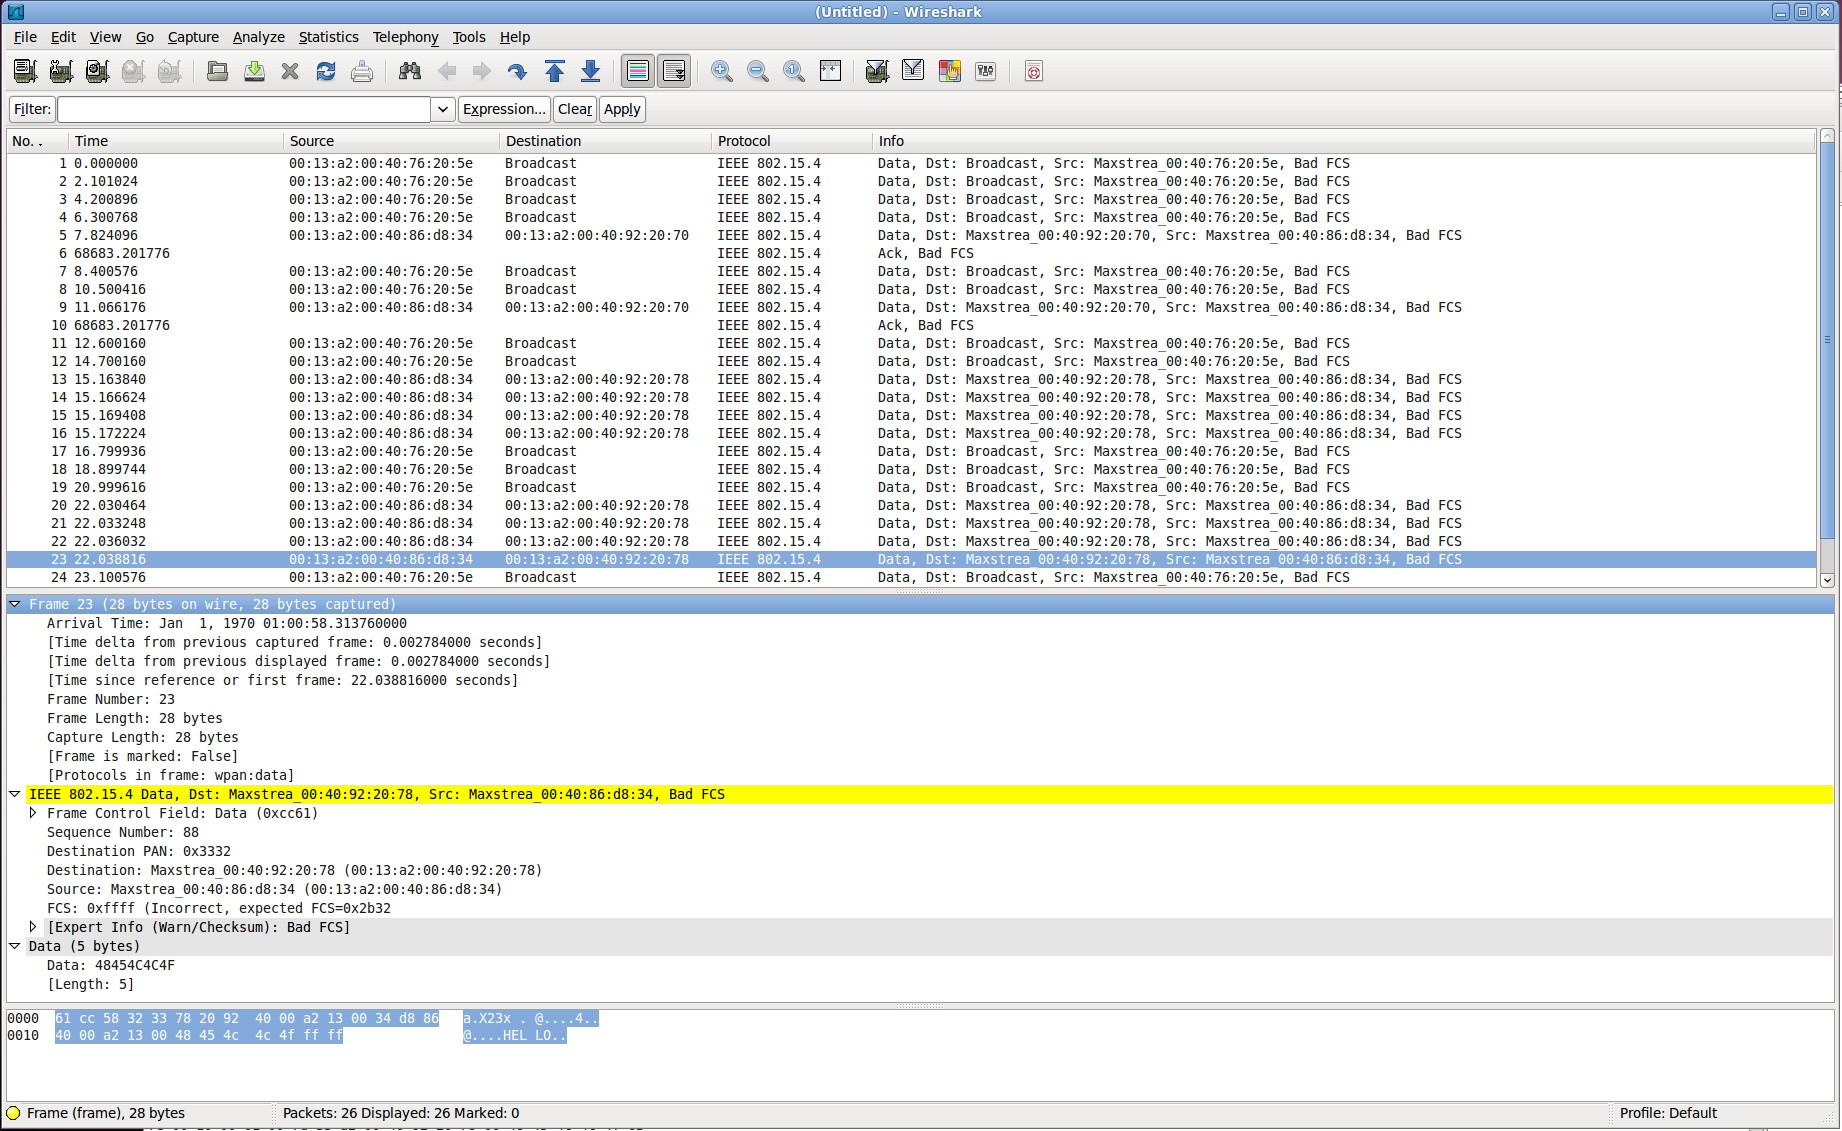
It is convenient to be able to plug the promiscuous sniffer to a
graphical tool such as the well-known wireshark program. Once
again you can use the same program but only on TelosB mote to
build a promiscuous sniffer that is capable of sending formatted
output to wireshark.
To do so, type:
>
CFLAGS="-DSNIFFER_CONF -DPCAP_SERIAL_OUTPUT" make telosb
> make telosb
reinstall bsl,/dev/ttyUSB0
There is a simple python program that will continuously read the
serial port and send data to wireshark. The mote will capture packets but
instead of using Printf
to display on the screen, it will send pcap formatted data to the
serial port. More information on pcap format can be found here.
The python program is TelosbToStdoutPcap.py
(there is also a MicaZ
version):
import serial
import shutil
import sys
# the pcap init sequence for little-endian system such as the
telosb
pcap_init_seq = bytearray.fromhex(u'D4 C3 B2 A1 02 00 04 00 00
00 00 00 00 00 00 00 FF FF 00 00 C3 00 00 00 00 00 00 00 00 00
00 00 21 00 00 00 21 00 00 00 41 88 01 34 12 00 00 78 00 77 69
72 65 73 68 61 72 6B 20 66 6F 6E 63 74 69 6F 6E 6E 65 20 21 AB
00')
# write the init sequence in a file
pcap_file = open('tmp_telosb-pcap-initseq.pcap', 'wb')
pcap_file.write(pcap_init_seq)
pcap_file.close()
# read from file and copy to stdout
with open("tmp_telosb-pcap-initseq.pcap", "r") as f:
shutil.copyfileobj(f, sys.stdout)
ser = serial.Serial('/dev/ttyUSB0', 115200, timeout=0)
# flush everything that may have been received on the port to
make sure that we start with a clean serial input
ser.flushInput()
while True:
out = ''
sys.stdout.write(ser.read(1024))
sys.stdout.flush()
Then you can run the following command with your TelosB mote
plugged in your computer on /dev/ttyUSB0:
> python
TelosbToStdoutPcap.py | wireshark -k -i -
you may need to give sudo permission:
> python
TelosbToStdoutPcap.py | sudo wireshark -k -i -
If running on /dev/ttyUSB1, just specifiy it in the command:
> python TelosbToStdoutPcap.py /dev/ttyUSB1 |
wireshark -k -i -
You can see the graphical result below:
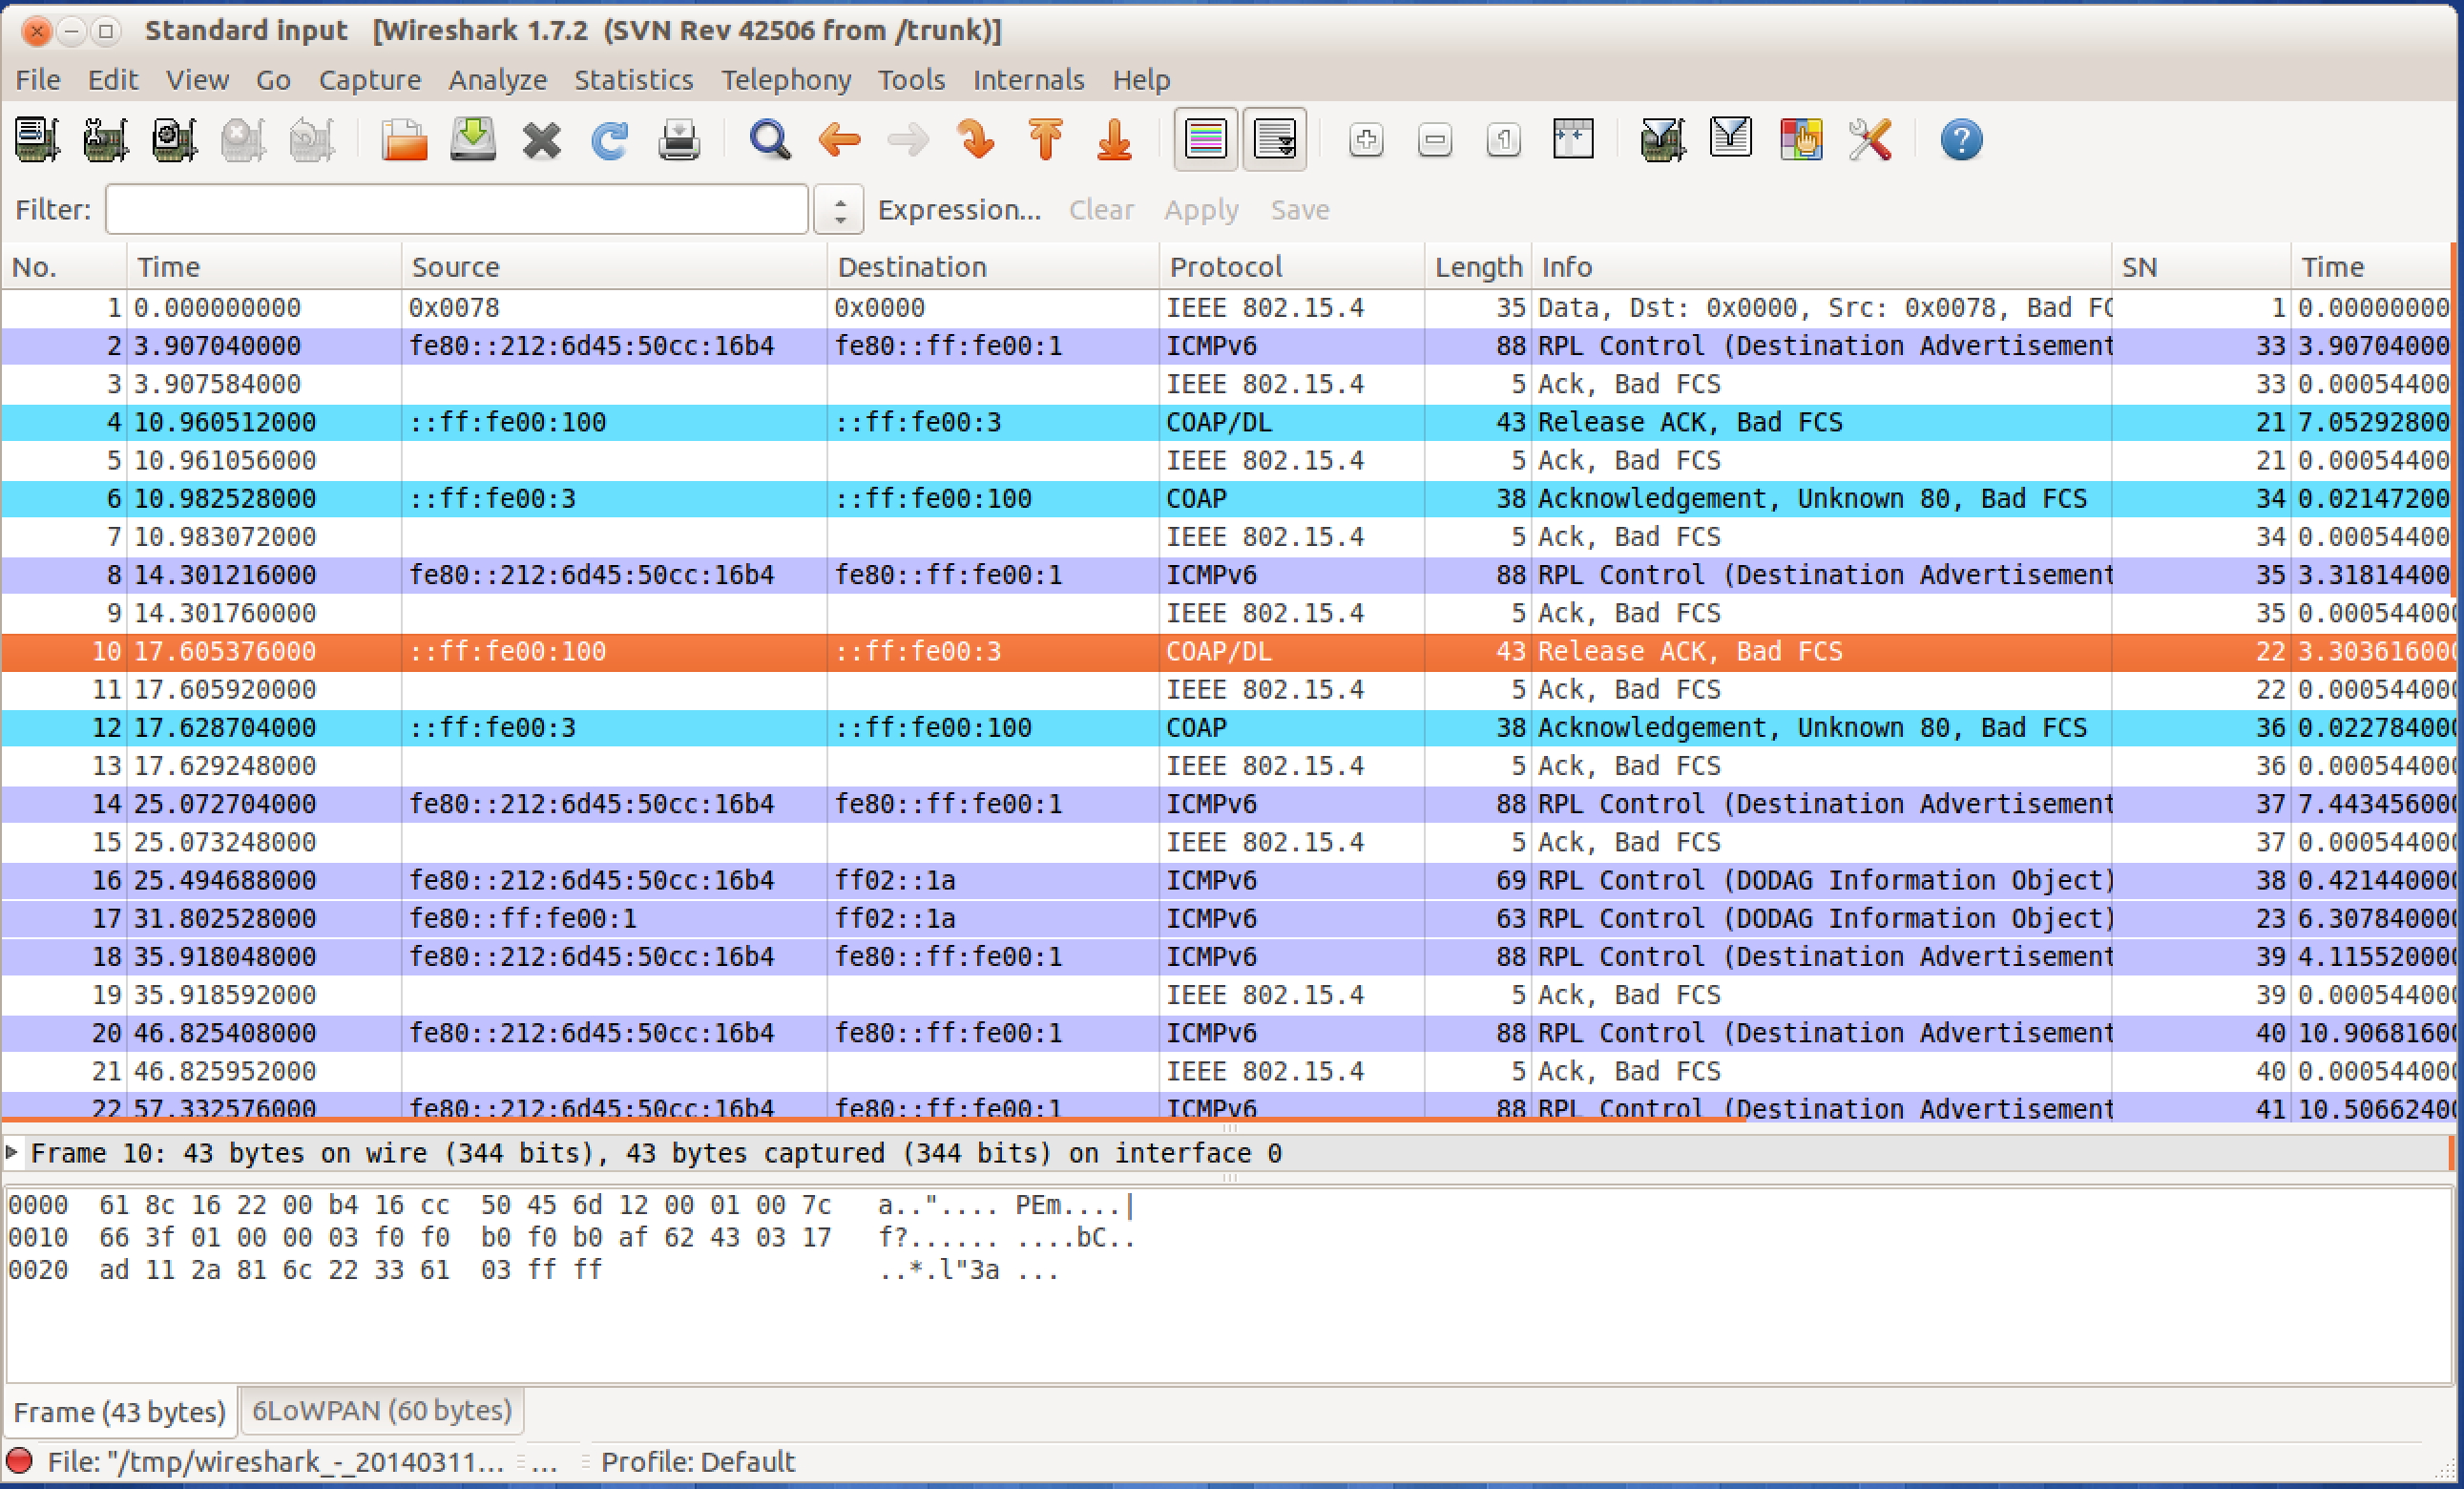
If you use a recent version of wireshark with 6LowPan/CoAP dissector, you
will be able to see RPL messages and CoAP exchanges as in the
CoapBlip example of TinyOS.
Limitations:
Acknowledgments: